You might be already familiar with the ruby support on windows. Many of us prefer using Linux for ruby on rails development. But if you cannot access a separate Linux installation OR your machine is not capable of running a full Virtual Machine , then this might be the way you can consider for ruby on rails and Redmine development.
You can follow these steps for Installing Redmine On Windows 10 With WSL2 Ubuntu
Contents
Step 1: Enable Windows Features
Here we need to enable Windows subsystem For Linux And Virtual Machine Platform features . After enabling we have to restart the machine.
This will create “pagefile.sys” and “hiberfil.sys” files in your “C” drive, with ~7GB additional space. The page file, also known as the swap file or paging file, is a file on your hard drive, this file is used to manage virtual memory (VM). You do not want to delete these swap files till you are using Ubuntu on Windows as VM. This will not affect your windows performance as it is managed by Windows.
Open start panel and search for windows features-

This will open windows features, from this enable “Virtual Machine Platform” and “Windows Subsystem for Linux” checkbox.

STEP 2 :Enable WSL and upgrade to WSL 2
You can refer official Microsoft doc for this step . Here. This will enable support for Windows Subsystem for Linux 2 aka WSL 2.
STEP 3: Install Ubuntu from microsoft store

STEP 4 : Change WSL version for Ubuntu
Check current WSL version used to run Ubuntu . run command in powershell.
wsl -l -v
If Current Version is not 2 , then convert it to WSL2 by running following command.
wsl --set-version Ubuntu-20.04 2Now , we have to launch Ubuntu from windows app menu . For first launch it will require some time for setup. Then you will be asked to set a username and password for ubuntu .
You can start Ubuntu with either using “Windows Terminal Preview” (download form Microsoft store) or directly from start menu.

Step 5: Download redmine
You have to download redmine and extract it somewhere . We will copy this folder inside /var/data/redmine directory in ubuntu .
Download redmine here
Extract downloaded zip file .
Now open ubuntu we have to create /var/data/redmine directory.
$cd /var/
$sudo mkdir data
$cd data/
$sudo mkdir/redmine
This directory will be owned by root user so we need to change ownership of directory.
$sudo chown -R username:username /var/data/redmine replace username with your username.
Now , from ubuntu terminal run following command to open windows file explorer at /var/data/redmine directory.
$cd /var/data/redmine
$explorer.exe .
Now , open another file explorer window and copy files which are in etracted redmine folder into this redmine folder.
Step 6: Install required Packages and dependencies
To setup redmine properly we have to install some dependencies . Run command to get them all .
$ sudo apt install mysql-server mysql-client apache2 build-essential patch ruby-dev zlib1g-dev liblzma-dev libmysqlclient-dev libmagickwand-dev Step 7: Configuring Database
I am using mysql as a database with redmine . Redmine also supports sqlite3 and postgresql . I will be showing steps for mysql .
First of all we need to create a Database .
$sudo -i
#mysql
mysql> CREATE DATABASE redmine CHARACTER SET utf8mb4;
>CREATE USER 'redmine'@'localhost' IDENTIFIED BY 'password';
>GRANT ALL ON redmine.* TO 'redmine'@'localhost';
Now we have to create database.yml file at /var/data/redmine/config/databse.yml and write following into it. (you can use vim or vscode also)
production:
  adapter: mysql2
  database: redmine
  host: localhost
  username: redmine
  password: "password"
  # Use "utf8" instead of "utfmb4" for MySQL prior to 5.7.7
  encoding: utf8mb4
Step 8: Installing required gems
Now inside ubuntu terminal run following commands to grab all the ruby gems required to run redmine.
$cd /var/data/redmine
$bundle install 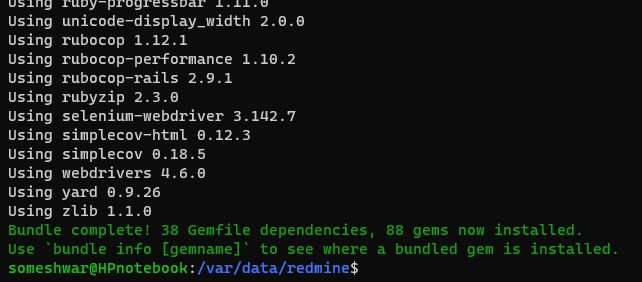
After completion of command you will get Bundle complete! . This indicates successful installation of all the required gems .
Step 9 : Installing redmine defaults and migrating data
From redmine directory we have to load redmine defaults and migrate data . Run following commands .
$bundle exec rake generate_secret_token
$RAILS_ENV=production  bundle exec rake db:migrate
$RAILS_ENV=production bundle exec rake redmine:load_default_data
step 10 : launch redmine
Now , we can run our redmine for that , we need to start webrick server .
$bundle exec rails server webrick -e productionNow open browser and go to ubuntuIP:3000. (To get ubuntu IP just run ” ip a” inside ubuntu terminal and look for IPv4 address)

Defaults: username : admin , password : admin
And that’s it , our redmine is up and running from WSL2 ubuntu on windows . Hope you have enjoyed reading steps for Installing Redmine On Windows 10 With WSL2 Ubuntu.
Note: this setup is done for production environment , you can repeat these steps for development or test environment by replacing word production with development OR test in commands.
Troubleshooting –
WSL not installed –
$ wsl
Windows Subsystem for Linux has no installed distributions.
Distributions can be installed by visiting the Microsoft Store:
https://aka.ms/wslstore
Please install WSL from Microsoft store.

2 Responses